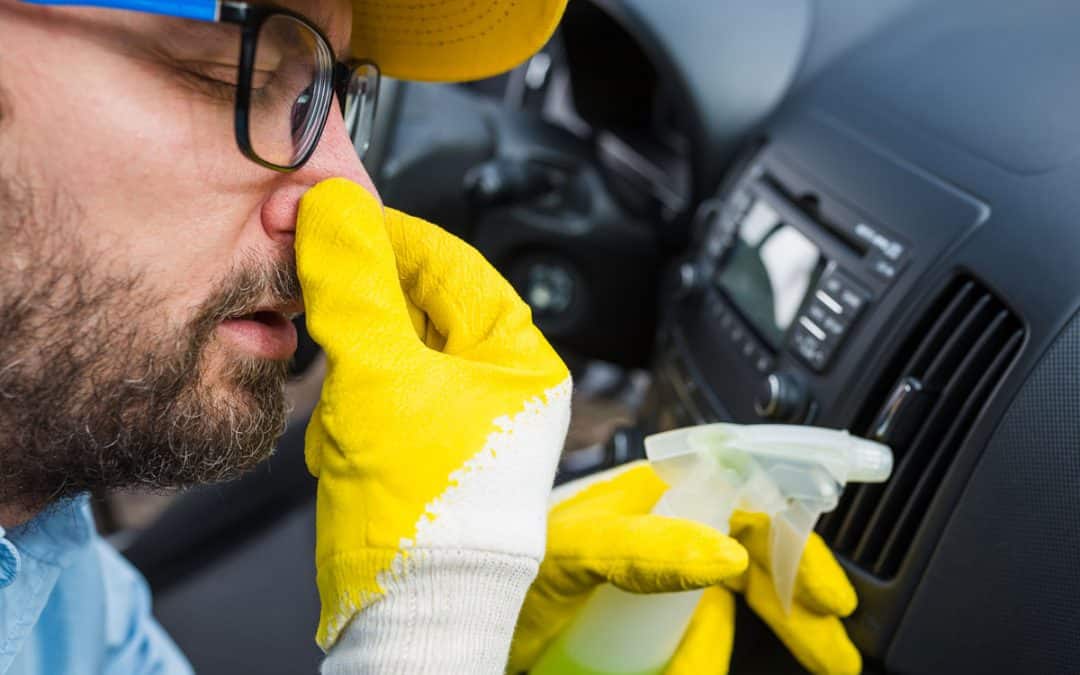
You’ve got a bad smell in your car, and no matter what you do, it won’t go away. That usually means you haven’t found the source of the unpleasant smell.
Unfortunately, there’s only so much you can do other than sprinkle baking soda and hope for the best. Removing stubborn odors is a problem best left to professionals.
A skilled professional detailer has all the right equipment, chemicals, and the most effective way to clean any vehicle properly. And when it comes to ozone odor removal in cars, the best way to do that is to use an ozone generator.
In this article, we will learn about ozone odor removal in cars.
Smelly Cars Can Be Awful. Clean it with Ozone Odor Removal. Photo Credit: AdobeStock by metamorworks
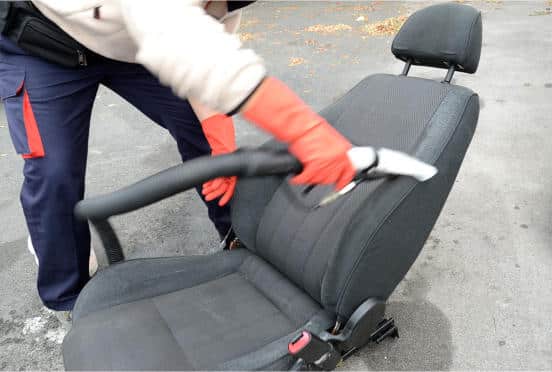
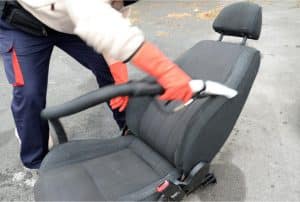
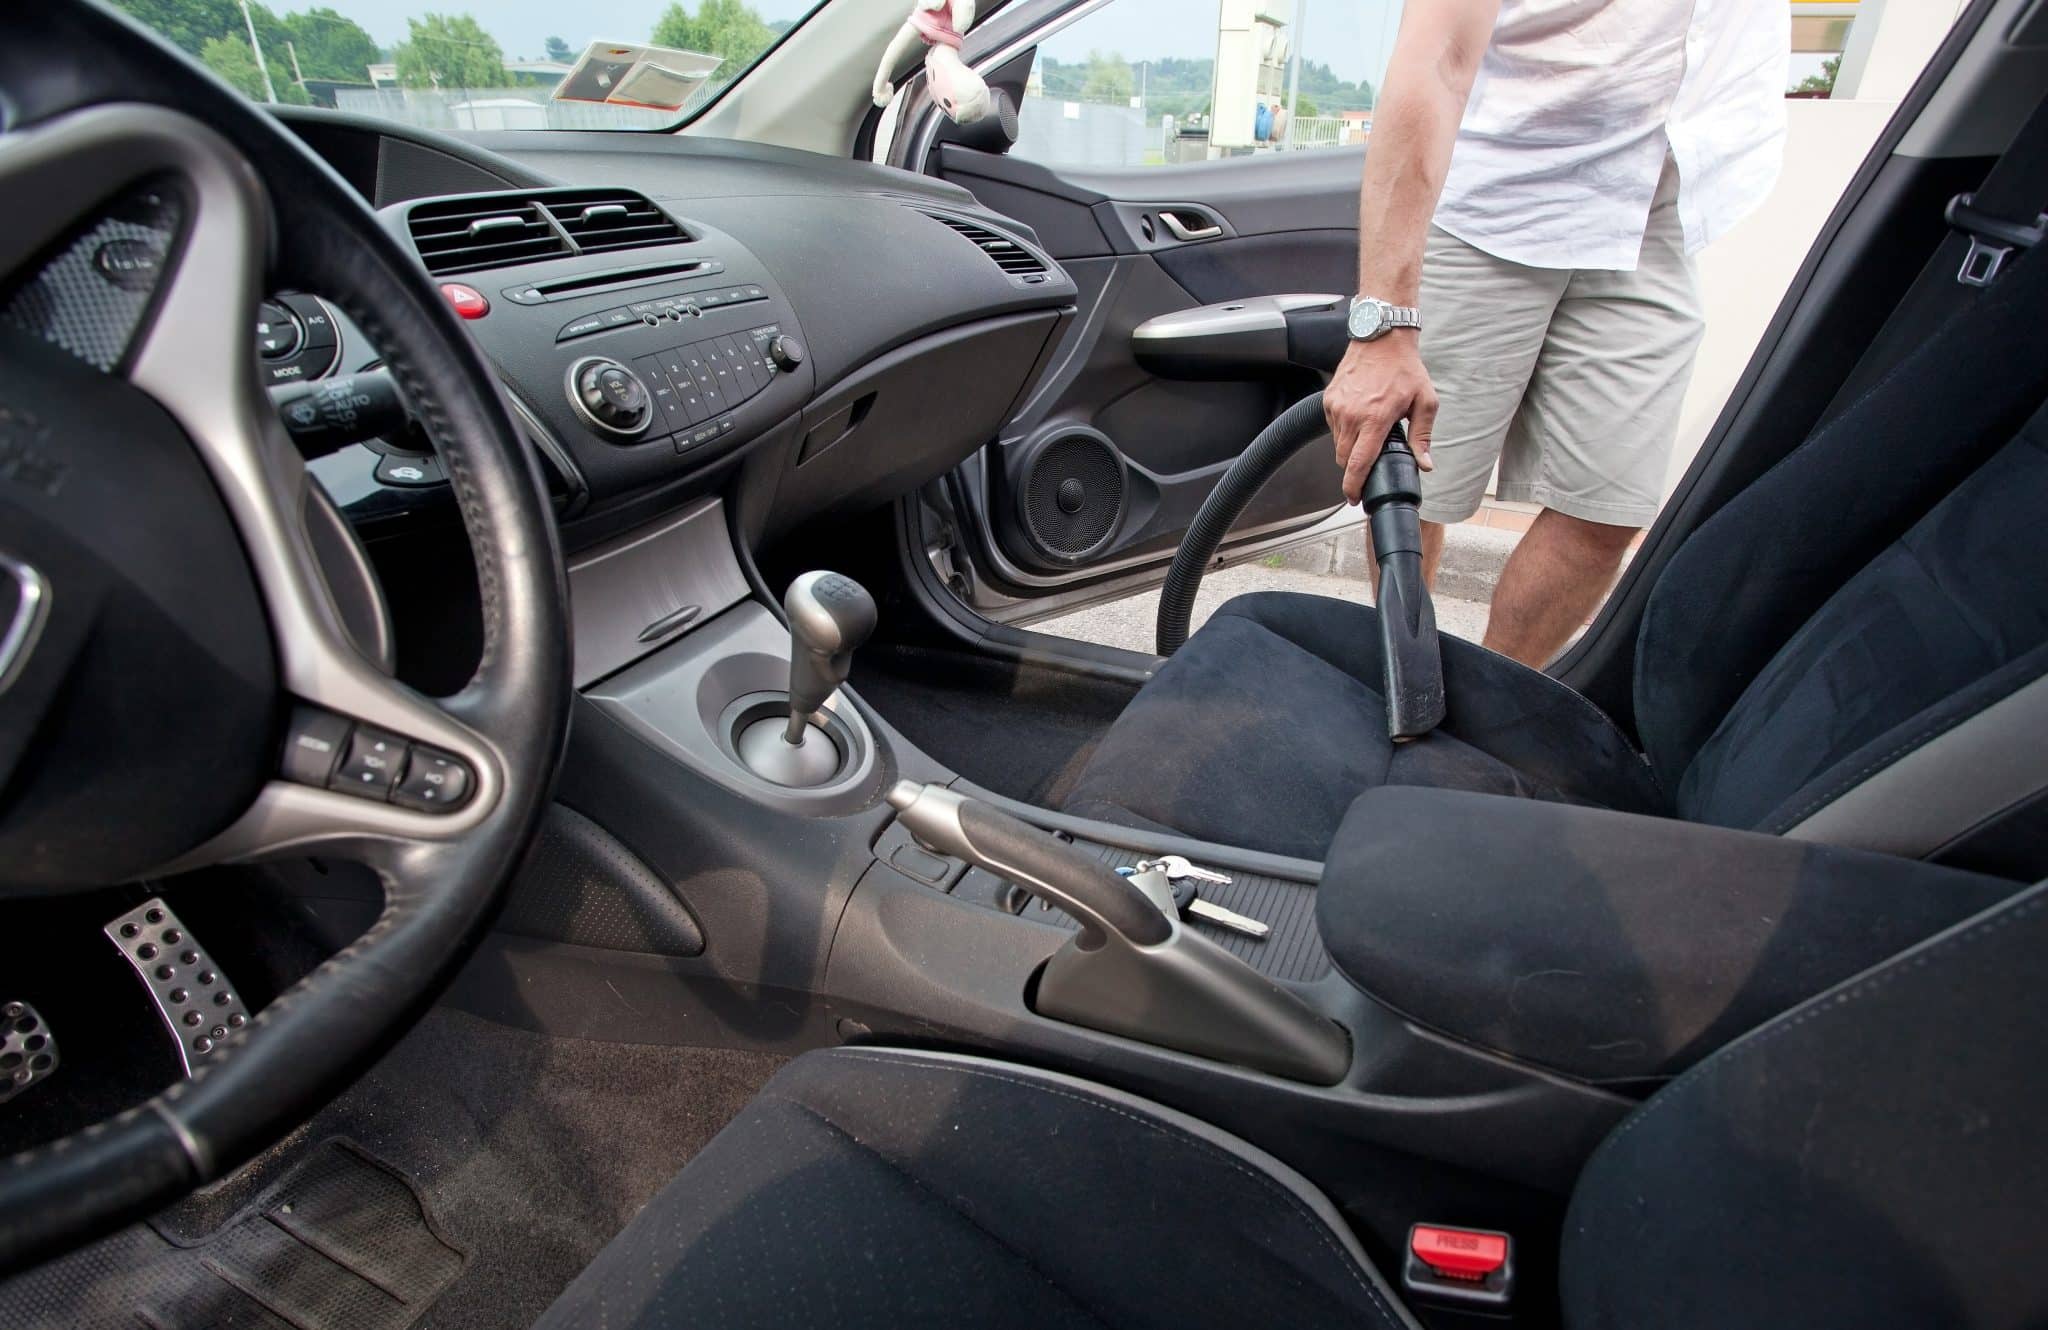
But even before we start with ozone treatments, you must find the source of the smell. The easiest way to do this is to wash and detail your car’s interior. Check out the information below for more info on locating the source of stubborn odors.
How Do Odors Get Into Cars?
Odors get into cars primarily through two sources: water and food.
You know how it goes; you’re driving along, and suddenly the car smells musty, or like someone just opened a can of paint. That’s because water has gotten into the car and created a perfect environment for mold to grow. Not only does mold smell terrible, but it can also cause various health problems.
Food is another common odor-causing culprit in cars. All those french fries, hamburgers, and tacos that we love to eat while on the go can create some pretty powerful smells. And like water, food can also lead to the growth of mold.
It’s essential to find and eliminate the source of car odors if you want the ozone treatment to be effective and permanent.
After cleaning the vehicle’s interior, an ozone machine is placed inside the car and fills it with the gas ozone.
Locate the Source of Stubborn Odors
It would disgust you if you saw all the things that create a bad smell for a professional detailer to locate.
Body odor from sweat-soaked car seats is one that still gives me nightmares.
Mold and mildew odors inside vents are a frequent problem that is unhealthy to breathe.
Spilled food and grease saturate upholstery fibers and create a bacteria breeding ground.
Cigarette smoke might seem bad, but cigar smoke has it beat for the worst of the odorous compounds.
Don’t forget secondhand tobacco smoke from riders in the car. Sometimes it’s not the driver.
Two words – old milk.
One word – vomit.
And you might think these would be unusual situations, but no young padawan, it is not. Ask any detailer about the worst car they ever cleaned. Then sit down as they regale you with a long story about that one minivan.
It’s always a minivan.
Babies are awesome but very messy. Make sure you are cleaning your kid’s car seat often.
And just because minivans are often in the worst condition, it’s not always kids to blame. I’ve seen many cars owned by salespeople that looked like they let a trash panda live out of it for several months. Ketchup-covered french fries, mashed between the front driver’s seat and the console, seem to be the choice of most salespeople in cars. It’s gross but fixable.
Find the Source of the Odor and Remove it Before Ozone
You can do it yourself or get it done by a professional. Either way, it must be done. Getting a full interior detail is usually the only way you will find the source of the smell. Nearly every smell in a car is caused by various organic sources such as rotten food or body fluids from humans or animals. It could be baby or dog vomit in the backseat. Or the ever-popular french fries in between the center console and driver’s seat. And if you’ve got small children, don’t overlook possible spilled milk on the baby’s car seat. There are simply too many possible sources to list here. We have an extensive list of odor-causing sources and how to remove stains and smells from car seats in our article on How to Clean Cars Seats with Household Products.
Defeating Bad Odors with an Ozone Generator
Professional detailers always boast about their cleaning process. Getting horrible stains out of a car is a big deal and a valuable skill.
Great car detailers also have a secret weapon in defeating foul odors. It’s called the ozone generator. And when combined with interior detailing, odors and smells have no chance.
I have used many deodorizing methods in two decades of cleaning and detailing cars, boats, and planes. But I have never run into bad smells that were impervious to ozone generators on all interior areas of a vehicle.
So let’s learn more about the magic of oxygen molecules and how they interact to make ozone odor removal in cars an excellent service to offer for killing car odors.
What is Ozone?
Ozone (O3) is a gas molecule composed of three oxygen atoms. Also called trioxygen, it is unstable and highly reactive. Ozone is created naturally by the sun’s ultraviolet rays and by lightning.
What Does Ozone Smell Like?
Did you ever hear someone say that they are able to “smell” rain or an oncoming Summer storm? There is some truth to that. They aren’t smelling the rain, per se, it’s actually something called Petrichor, which was named back in 1964 by Australian scientists trying to describe the distinct scent of rain in the air. They found that right before a rainfall, the earth releases a mix of several naturally occurring elements, plant oils, and ozone. This clean, fresh smell will often also remind people of a faint chlorine odor like a nearby pool.
Why is Ozone Used to Remove Odors?
Use ozone odor removal in cars, boats, planes, and anything else that can become smelly over time. It is simply the most effective way to kill an odor.
When ozone comes into contact with odor molecules, it binds to them and destroys the molecules. The ozone molecule is small enough to fit between odor molecules and destroy them, thus eliminating the odor. The smell is gone for good as an ozone treatment does not leave a nasty smelling residue like some irritating chemicals found in commercial cleaners on the market.
When you use an ozone treatment, it is so much more effective than air fresheners that only temporarily mask the problem.
And ozone gas permeates throughout available space. That makes it an excellent choice for getting rid of smells in hard-to-reach areas such as inside a car or boat.
How Does an Ozone Generator Work?
A commercial ozone generator is a relatively simple device consisting of specific wavelength UV light (ultraviolet) lamp tuned to 185nm wavelength, a fan to move air through the machine, a transformer to power it, and a box to hold it all together.
So how does an ozone generator work? It essentially creates negatively charged ions. Those ions attach to the larger particles of the pollutants and odors. Then the generator blower sends the particles through its electrostatic filter to be cleaned out later.
A more detailed lesson on the science behind how an ozone generator works can be found on this excellent web page from Oxidation Technologies, titled “Ozone production from UV.”
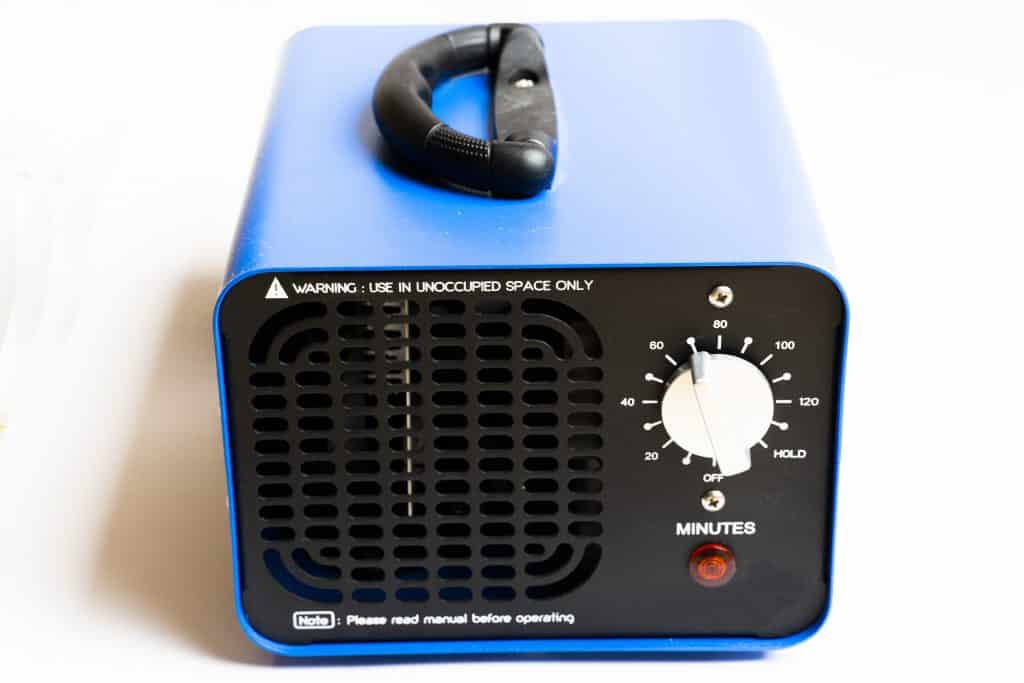
The ozone treatment process is somewhat time-consuming since ozone generators are left inside the vehicle from 30 minutes to 120 minutes. It is also crucial to follow safety procedures like never allowing people or animals inside vehicles when using an ozone generator. And always air out the car for at least 40 minutes after ozone treatment.
An ozone generator with a timer is a better choice in case you forget to remove the machine. Photo Credit: Adobe Stock: Patricia
How Much Do Ozone Generators Cost?
An average-sized Ozone Generator will produce between 5,000 mg/h and 10,000 mg/h and cost anywhere from $100 to $500 or more. You can find cheaper ozone generators, but they won’t necessarily hold up under the stress and frequent use of an auto detail shop. I found several units online that I would consider durable and reasonably priced in the $70 to $199 range. Just be sure to check that the unit you buy doesn’t have a “not for commercial use” disclaimer.
The great thing about ozone generator units is that they work to remove hard to eliminate smells like smoke and mildew, so the upsell is easy. And this service can be a long-term profit source for any detail shop that manages it appropriately.
Using Ozone Generators to Disinfect Against Covid-19 Viruses
Ozone is a very effective disinfectant in buildings, vehicles, and anywhere with surfaces to protect. In a technical information paper titled, “Use of Ozone Generators Against Covid-19”, the US Army Public Health Center found that using 2.5 parts of ozone per million parts of air (parts per million (ppm)) to 5 ppm will effectively disinfect against covid-19 viruses and limit damage to surfaces.
Another report by the National Institutes of Health (NIH) in December 2020 listed multiple case studies showing the effective use of ozone gas as a disinfectant and its anti-viral properties. One such study titled “Ozone gas as a virus decontaminating agent” discussed the use of peak ozone gas concentration of 20-25 ppm for a very short time resulted in 99% of viruses being inactivated. In fact, according to the study, “there was not even a single virus which was resistant to ozone.” That is out of 12 viruses they tested.
When you offer ozone odor removal in cars as a service, adding a few items to advertising mentioning how ozone machines can be used as an effective disinfectant could potentially be a significant opportunity for additional profit centers. All your potential customers are worried about viruses, so being able to disinfect customer cars against Covid-19 viruses is a great selling point.
How Much Does Ozone Odor Removal in Cars Cost?
When it comes to an ozone car treatment price, you can usually expect to add $150 to $300 or more onto your standard full detail charge. We call this the Ozone Machine Upsell. Offering ozone odor eliminator services for cars will become a significant profit center for any auto detailing business. You can offer a guarantee to make it an easier sell. Our shops told customers that if we didn’t eliminate the foul smell, they don’t pay the additional ozone car treatment price. That makes it easy to sell.
Ad Copy for Ozone Odor Eliminator for Cars Service
Here’s the copy we use on flyers and web pages when advertising the ozone generators for odor removal services. It spells out precisely what it does for your customers:
Our ozone odor eliminator for cars service is the most advanced in this region. This service is an add-on when combined with an interior detail or a full premium detail. We start by removing any hidden garbage or possible sources of the smell. Then we vacuum the interior carpet and upholstery, followed by steam cleaning the car interior. The Ozone Generator Machine is placed in your vehicle for 30 to 120 minutes, depending on the severity of the smell. This process will neutralize bacteria, mold, mildew, pet odors, smoke, and many viruses, including influenza and Covid-19, on exposed surfaces within your vehicle. The ozone gas fills your car passenger compartment, trunk, air ducts, heater, and air conditioner with concentrated odor-killing ozone gas. This service adds one to two hours to any detailing package.
Bad Odors Make Motivated Customers
Vehicle odors make very motivated customers. Ozone treatments will give you an edge in bringing back the new car smell your customers want.
And they will understand that you invested in ozone machines that will remove everything from pet odors to bad car smells in about half an hour. So it’s going to cost them some money for ozone treatments.
By guaranteeing your work, you give your customers peace of mind that they aren’t getting baited into something they don’t need.
Ozone Odor Removal in Cars
Your focus should be on the technology, required equipment, and effectiveness to sell services for ozone odor removal in cars. The alternative is for the customer to try a DIY baking soda and activated charcoal blend and spend a few hours scrubbing their car interior.
Just make sure they understand that ozone treatments are one of the only reliable methods for eliminating hard-to-remove odors like smoke, bacteria, mold, and mildew in car upholstery and carpets.
Offering ozone odor removal in-car services at your shop will be an excellent value-added service that your customers will appreciate.
Paint overspray is usually removed by clay bar, microfiber, and lots of elbow grease. Photo credit: Adobe Stock
Paint Overspray Removal on Cars
If you own a car or truck there’s a good chance you’ve run into a situation where you need paint overspray removal services.
Or you might be a detail shop owner here to learn more about removing overspray from cars. Which, by the way, is an in-demand and badly needed service. Especially if you live near a city.
Either way, we’ve got you covered. This paint overspray removal page is one of the most popular online resources available anywhere for this topic.
In this detailed guide on paint overspray removal, I will cover the following:
Paint overspray generally concerns unintentionally applying paint or a similar coating to a surface that wasn’t the original target. In other words, you accidentally created a mist of paint spray that floated away and landed on nearby cars, houses, and buildings.
For obvious reasons, it’s not a great situation to be in if you are the person that created the overspray.
And for reference, even though I’m focusing on paint and related coatings, overspray can occur anytime you spray a liquid chemical in the air.
Where Does Paint Overspray Come From?
Unfortunately, it’s often left up to the owner of an overspray-damaged vehicle to channel their inner Sherlock Holmes and search out nearby clues as to the source of the paint overspray.
Sometimes it’s as easy as looking up to see a bridge or office building getting painted. A simple Google search will result in large numbers of paint overspray horror stories. Like the water tower painter who accidentally covered 900 cars in a wet droplet cloud of epoxy paint.
In those situations, one of the responsible parties will usually hire a paint overspray removal specialist to fix the car paint at your house or take it to their local detail shop or similar facility.
List of Common Sources of Paint Overspray
If you need some ideas on where to look, the following list is a good place to start. Just remember, on windy days paint overspray can travel a fairly good distance before drying and falling to the ground.
Bridge painting projects. Look for white tarp-wrapped bridges. They use industrial epoxy coatings that stick to anything.
Construction site and large office building painting. They also use epoxies that aren’t clearcoat-friendly. The wind up there moves fast.
Painting Water Towers. Most hold a million or more gallons and are hard to tarp for painting. Both the insides and outsides are painted with heavy zinc primer and two coats of epoxy paint.
Residential home exterior painting. Never underestimate the power of one painter with a spray gun. They can overspray an entire neighborhood in less than a few hours.
Wooden decks and porches. The double whammy of epoxy deck stains and polyurethane sealers. Looks like tree sap, but sticks to anything.
Tree Sap. If you see something that looks like hard, sticky syrup on your car, look above and you will most likely see the tree that caused it.
Road paint and highway line paint.Highway paint removal is so bad that we gave it a page of its own here on the ADG website. It’s called hot melt marking paint and it’s sprayed on roads after heating it to 392 degrees (Fahrenheit). Road paint removal is difficult but entirely possible to do as a DIY project at home.
Will My Auto Insurance Cover Paint Overspray Damage?
According to insurance claims experts, more than 1,000 vehicles a day are damaged with paint overspray, resulting in damage claims in excess of $500 million annually.
The problem with quoting statistics is that they don’t always give the full picture. If a professional painter causes overspray damage to your car, they are usually liable to pay for damages.
Usually? Well, there’s the little problem of actually getting paid. We have a similar article here on our site that goes into more detail on locating the source of the overspray and figuring out how to get them to pay for the costs of professional paint overspray removal. Check it out when you have some time.
Contractor Insurance That Excludes Overspray Claims
Liability insurance carriers, the people that cover contractors, are painfully aware of the costs involved with damage to car paint and clear coats from overspray.
That’s why liability insurance costs so much. And also why many painting contractors don’t carry liability coverage. It’s an expensive cost of doing business for any professional contractor. So naturally, some contractors let their policies lapse because they can’t afford the cost.
Insurance companies understand that cost is an issue. So to make these policies affordable, companies offer cut-rate discount contractor insurance. It makes sense for a painting contractor that only offers interior painting services to save money on their contractor liability insurance by choosing to exclude coverage for paint overspray claims. On the other hand, some painting contractors that do exterior painting might choose to exclude overspray coverage if they’ve never paid claims related to that type of damage.
The other issue is deductibles. Yet another way that liability insurance companies can reduce their exposure and offer lower rates is by setting a per-incident deductible. So that painting contractor that says they have overspray coverage, may in fact have a policy that sets per claim deductibles above $500. This means the painter will be paying out of pocket up to $500 per car.
Here is where I add the obvious disclaimers about how I’m not a lawyer and this isn’t legal advice. But it also doesn’t take a rocket scientist to figure out your chances of recovering that money might be difficult. Either way, you should always consult with your auto insurance carrier and your lawyer.
Insurance Deductibles and Overspray Damage
Now let’s talk about your side of the equation as the victim of this overspray problem.
The average deductible for an auto insurance policy in the United States is $500.
And most overspray removal service bills come in at less than $500, depending on the extent of paint damage and how much work is involved.
Regardless of how much money it costs, it is always frustrating being forced to pay for damage to your car paint that is caused by a “professional” contractor. Any professional should know how to properly do their job.
This is why I mentioned above about speaking with a good lawyer about your claim. They might have ideas for possible ways to mitigate your out-of-pocket costs and recover your money from the contractor.
Don’t give up if you run into roadblocks. It’s your money, fight for it!
How Much Does it Cost to Remove Paint Overspray?
The typical cost to remove paint overspray from a vehicle ranges in price from a low of $150 to a high of $500 or more. These rates are standard for professional detailers or reconditioning techs.
To clarify a few things, the price you pay will greatly depend on the size of the vehicle, the severity of the overspray damage, and where it’s located on the vehicle.
For example, is it just the windshield or is it covering the entire vehicle? And if it’s everywhere, is it a Kia compact or a Yukon Denali XL SUV? Obviously, the price points will be wildly different depending on those types of differences.
Another criteria that often affects overspray removal prices, is the type of surface. Removing paint overspray from glass windows is measurably less difficult than removing it from body paint or plastic trim.
DIY Paint Overspray Removal
So up to this point, as far as paint overspray is concerned, I’ve covered what it is, how it happens, who is responsible to fix it, and ways you might be able to get reimbursed for your out-of-pocket costs.
If you exhausted all of those options and you are paying for paint overspray removal out of your own pocket, then you might be interested in fixing the problem on your own.
Let me just point out, upfront, DIY paint overspray removal is absolutely something you CAN try at home. A lot of people think it’s something only professionals can handle, but it’s not.
And it’s definitely NOT expensive. But as I will cover in the next section, paint overspray removal is very hard work. And you must be careful or you could end up destroying your car paint.
Is It Hard Work to Remove Overspray from Cars?
Yes, paint overspray removal is very hard work. That’s why detailers charge so much to remove it. And by hard, I mean labor-intensive. Not like back-breaking work moving a truckload of concrete blocks to your backyard.
DIY paint overspray removal is more on the level of setting aside a bunch of hours to take a clay bar and rub it on the outside of your car. And wash it. And rubbing it more. And washing it.
Clay on. Wash off. Clay on. Wash off. Very good Danielson.
Wax On. Wax Off.
Speaking of Mr. Miyagi. Removing overspray is one of those things that takes a frustrating amount of time to complete. Mainly because every time you think you’re done, you find some more.
Each time you dry your car after washing it, run your hands over the car again and try to feel for the tiny bumps of hard overspray paint droplets.
When you feel the paint bumps, you do that area over again.
And you will find some. Again. And Again. It’s frustrating how there are always a few that you miss.
Then you keep doing it all over again. And again. And again…
Wax On. Wax Off.
Wax on. Wax Off. Photo credit: Ralph Macchio (L) as Daniel, Pat Morita (R) as Mr. Miyagi in ‘The Karate Kid’ (1984), Columbia Pictures
Disclaimer: I am obviously not Mr. Miyagi. I’m good, but not that good. So no, you won’t mysteriously know blackbelt level karate after you are done following my instructions for removing overspray from your vehicle.
You will, however, be as sore as I imagine Danielson was after he spent all day waxing all those cars for Mr. Miyagi.
Step by Step Paint Overspray Removal Instructions
If you are ready to get started, I have included a step-by-step instruction list for removing paint overspray from your car.
So let’s go!
First, a quick note. If you have any corrosive damage to your paint from environmental causes, paint overspray removal processes like the following will most likely not repair that type of damage. This is for the removal of hard droplets of dried paint overspray on your car exterior.
What are the environmental causes of corrosive paint damage?
Since I brought up environmental causes of corrosive paint damage, let’s briefly discuss this so you know the difference going into this.
Paint corrosion problems caused by the environment have been in the news for decades. These are issues like acid rain, toxic industrial exhaust or plant discharge, even bird crap that’s sat on your paint for too long.
It’s all toxic to paint.
These environmental conditions can eat away at your car’s clear coat and paint. It’s fixable, so don’t think you need to repaint the entire vehicle. That’s usually not the case.
Many auto paint repair and reconditioning services can fix those problems without the need for a body shop.
But the tips I’m including here in these instructions, like clay bars and high-speed buffing, usually won’t fix corrosive damage problems.
Those repairs need to be made at a body shop or a car detailer that handles auto reconditioning services like auto paint repair, paint chip repair, bumper painting, etc.
So now that we are on the same page, let’s get started.
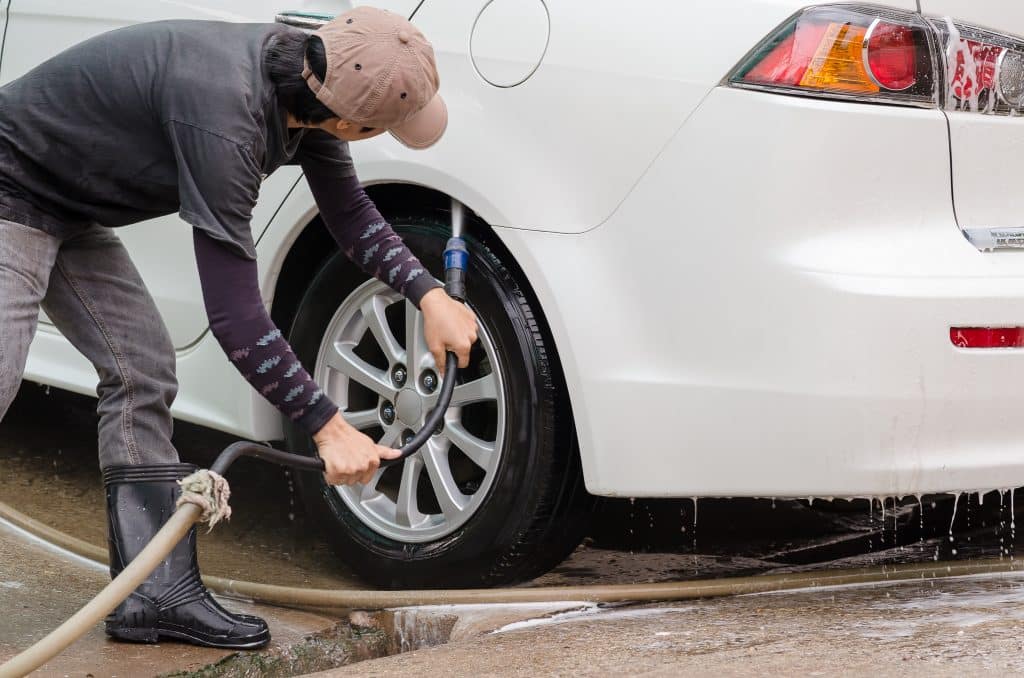
Wash Your Car with a Pressure Washer
The first step in the overspray removal process is to scrub your car. With soap. But the more important part of this step is to use a pressure washer during the entire wash process. Even the self-service car washes with the bays sometimes have enough pressure for this step.
Can I Use a Pressure Washer to Remove Paint Overspray?
Well, yes and no. Using a pressure washer while removing paint overspray is effective in blowing off or loosening droplets of overspray that were somewhat dry when they landed on your vehicle. Even though these droplets are still attached to your car, the bond with the clear coat isn’t always strong. Especially if you were quick to fix the overspray damage.
So yes, using a pressure washer will sometimes remove a significant portion of the overspray droplets from your car.
Especially if it was a long-distance that the paint droplets traveled in the air from the paint sprayer nozzle to your car.
The longer the distance traveled, the drier the droplet when it lands on your car. Ultimately, that results in a bond with the car clearcoat that isn’t as strong as fully wet droplets.
So always start with a good wash and always use a pressure washer.
How to use a Clay Bar on Car Clear Coat
When it comes to painting overspray removal you need to start with a good clay bar. Detailer’s clay, as it’s called, is a special mix of clay that works incredibly well at removing impurities from your paint.
But how do you use a clay bar to clean a car clear coat? It’s a simple enough system. You take the detailers clay and wet it. You are also going to need some form of lubricant for the car paint surface. This is always a subject of debate whether you need special lubricants or not.
Some detailers will tell you that you need to use everything from spray-on finish wax to showroom shine products to keep the clay lubricated.
From my experience, a simple solution of Joy dishwashing detergent works great.
Your goal is to keep the clay bar lubricated as you rub it across the clear coat in a circular pattern. So whether it’s spray-on finish wax or dishwashing detergent, both will work.
Detailer Clay Bar and Lubrication
It’s a one, two process. Rub the clay in circles and keep following behind it occasionally with your other hand to feel for the dry bumps that overspray creates.
Keep going over it with the detailer’s clay until it’s gone, lubricating your work area as needed. Also, keep rinsing the areas you have completed, so you don’t let the clay dry as you are moving forward on the vehicle.
Another cool feature of clay is if you have already waxed the car, the clay bar won’t remove the wax on the painted surface, but it will remove the overspray.
Always Use the Clean Side of a Clay Bar
Something else to keep in mind while you are using the clay is that you need to keep folding it back into itself while you are rubbing it.
The clay will start getting dirty as it’s pulling everything off the painted surface of the car. So keep folding it over on itself, and you will always have a clean surface.
Eventually, the clay will need to be replaced, but one bar will do many, many cars. If you are doing this at your home, that one container of clay will last you a long time.
Another thing to keep in mind. Always keep the clay wet. It should come in a bottle with a replaceable cap. Fill the jar or container with your water and Joy detergent solution and put the cap on tight before you put it away after using it. This will keep it ready for the next time you need it.
After you have completed the entire car, you will want to wash the vehicle using your standard car wash soap mix with a soft wool wash mitt.
Once it is dry, you will be able to feel for any areas that you missed.
Can I Remove Paint Overspray with a High-Speed Buffer?
Short answer, no you should not remove paint overspray from your car paint or clear coat with a high-speed buffer.
Is it possible? Sure. But even after I spent a decade becoming an expert wheelman with a high-speed buffer, I still limited the situations where I needed to use one. The reason was simple. High-speed buffing can damage car paint and clear coats. The longer you use it on the car, the higher the chance for burnt or damaged paint.
When I was first learning how to use a buffer, we had an old car door we practiced on in our shop. I burnt straight through the paint to the metal on my first time. It was practice, so it didn’t matter much. But it was scary how easy it was to do that.
And burnt paint is just one of the many possible things that can go wrong with high-speed buffing. Spend too much time with a buffer on car paint and you are just asking for burnt paint, ripped molding, damaged accessories, and so many other possible and exciting ways you can damage a car.
Take my advice that I give to everyone that asks about high-speed buffer. Get an orbital buffer. My favorite for the past two decades is the Porter-Cable High-Speed Orbital Buffer. It’s a variable high-speed orbital buffer. The orbital aspect is what I love about it since it all but eliminates the chances of both burning paint and the clear coat swirl makes that a lot of buffers leave in dark color cars.
Nano Ceramic Coating or Polymer Sealant After Clay Bar
A car that has been through the clay bar cleaning followed by either high-speed buffing or orbital buffed to remove any swirls looks absolutely incredible. Apply a nice coat of Nano-Ceramic Coating or a Polymer Sealant to the paint after you are done, and your car will be ready for six months until you need to reapply. Personally, I love the Hydro Slick Ceramic Coating Hydrowax from Chemical Guys. It makes your car clear coat incredibly smooth.
The paint overspray removal process is not an easy one, but it looks great once it’s done.
When it comes to my preferences for detailers clay, I tend to stick with Meguiar’s brand detailing products. They have a Meguiar’s C-2000 Professional Detailing Clay which is a great product. These clay bars do a fantastic job of paint overspray removal. Highway paint, tree sap removal, and more.
Over the past two decades, I have used hundreds of bars of detailer’s clay. Meguiar’s and Griots are the best clay bars I have used, but my personal preference is Meguiar’s. I just really like the feel of their clay bar in my hand when I’m working it over the car paint surface.
Hopefully, this information helps you to get your car back to top condition after dealing with paint overspray damage. If you have any questions, please feel free to drop me a note on our Facebook Page and/or sign-up for our free weekly ADG newsletter. We share exclusive content with our subscribers that isn’t always posted publicly.
As always, thanks for spending time here at Auto Detail Guide!
Car engine cleaning tips are important for many reasons. A clean engine runs cooler and helps improve fuel efficiency. It also prolongs the life of your engine. So cleaning the engine properly requires the best practices available.
A Clean Engine will Increase a Vehicle’s Resale Value
Another benefit is when you sell or trade-in a vehicle. A clean engine will increase resale values. This is why car dealers always have their vehicles fully detailed with shiny engines.
Unfortunately, since there are many ways that an engine can be damaged, you need to make sure you follow the procedures.
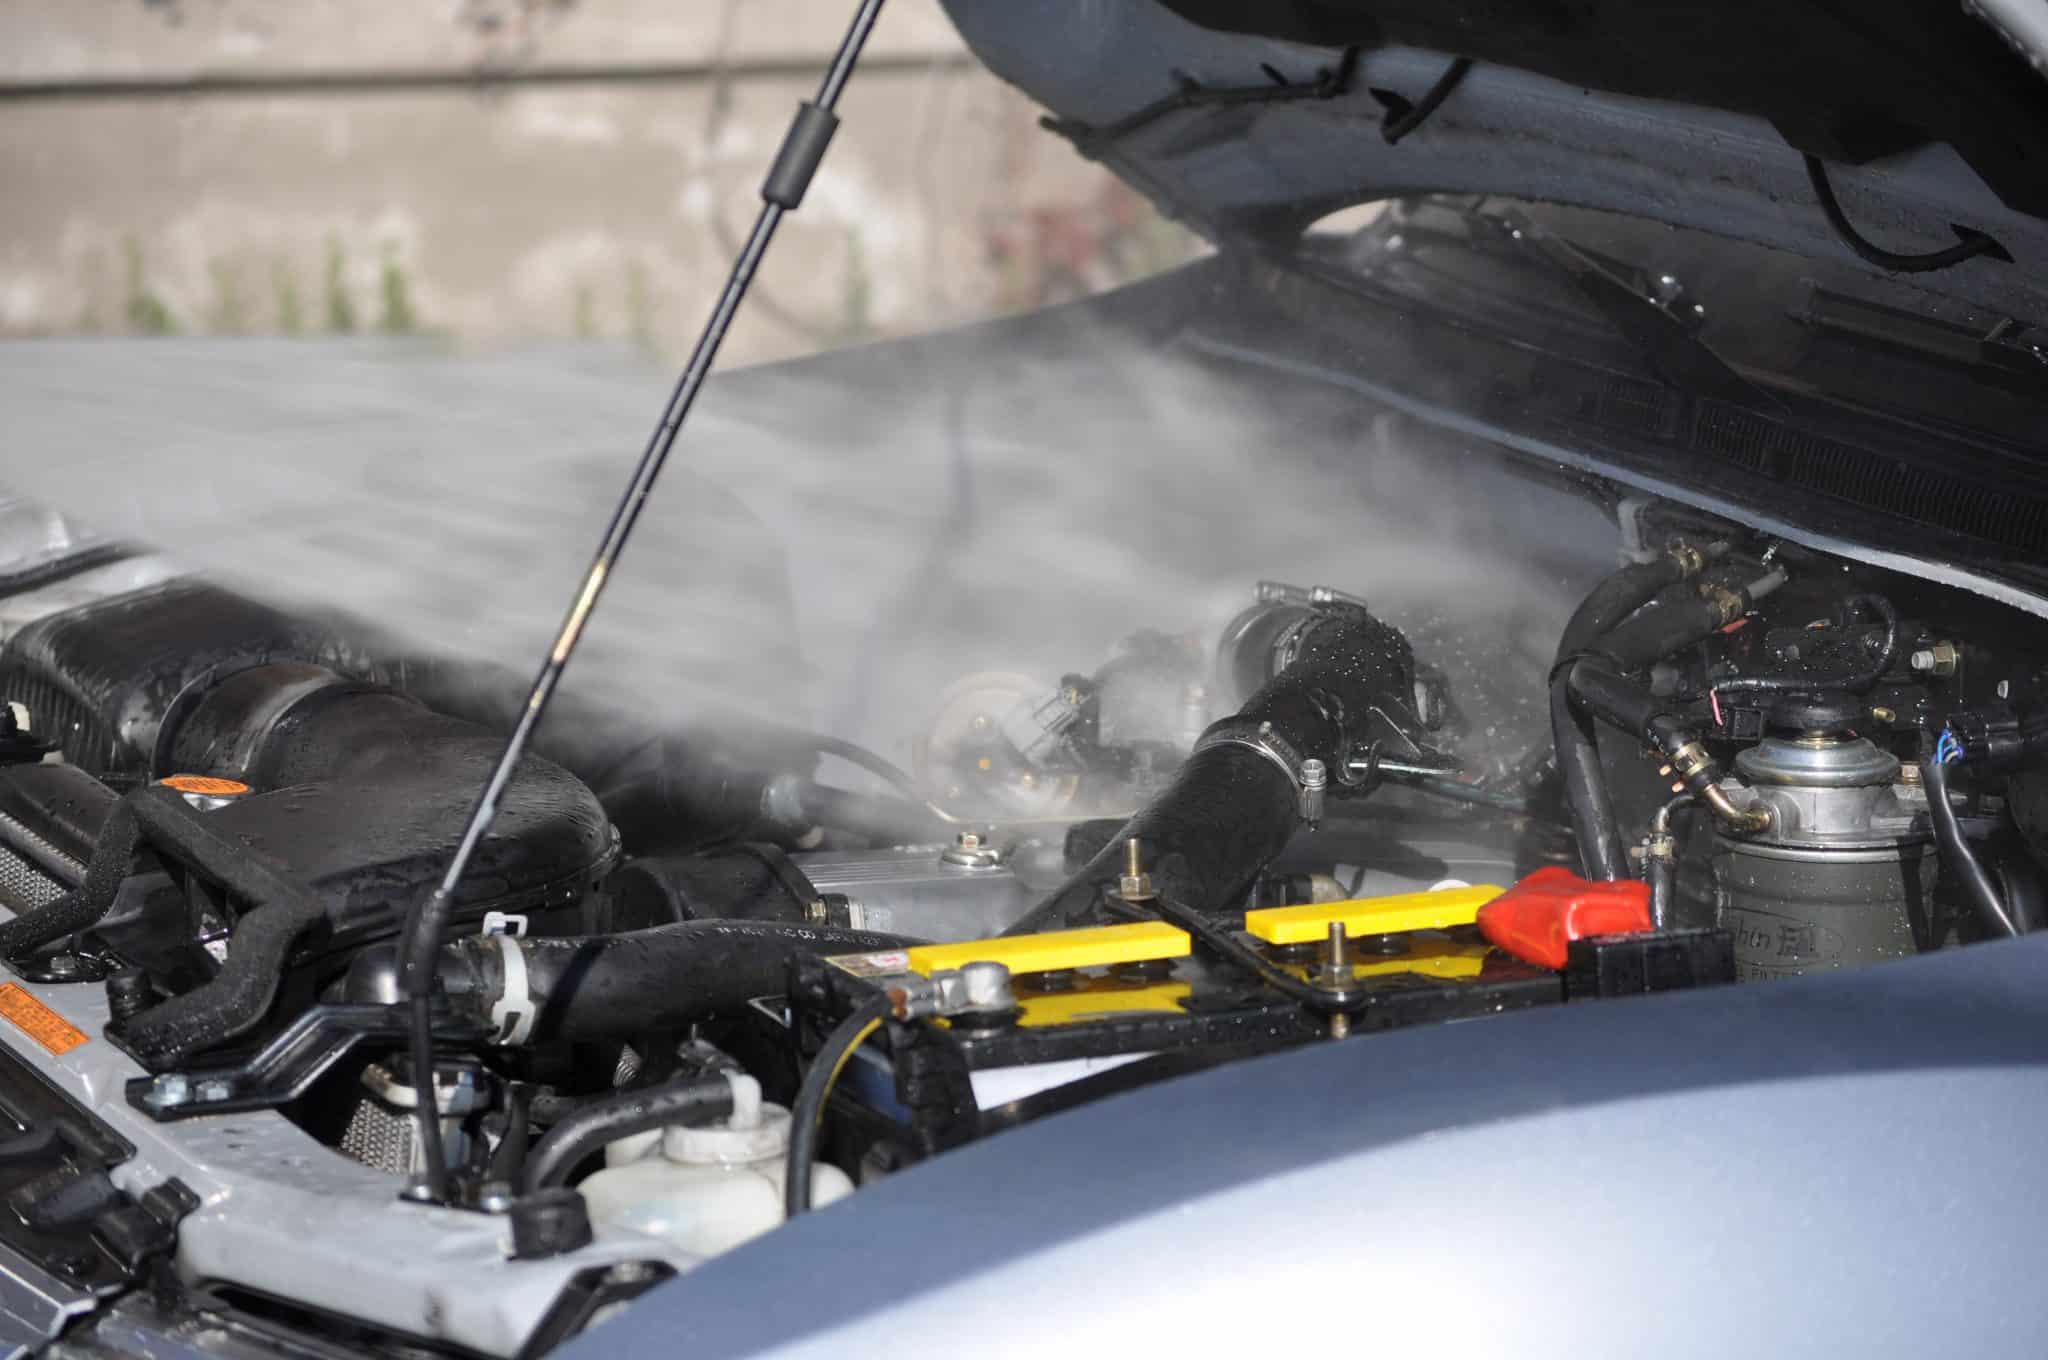
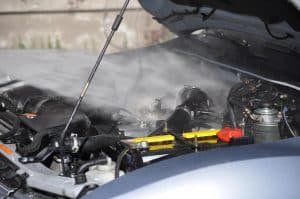
A Heated Pressure Washer is Preferable
Car engine cleaning is easier when you have the correct chemicals and equipment to do it. A heated pressure washer (aka steam jenny or hot water pressure washer) is preferable but not a necessity to properly clean an engine.
With a heated pressure washer or a steam pressure generator you can use less chemical and degrease the engine faster.
Cold Water Works Too
If you don’t have access to heat, cold water works too. FYI, it is possible to clean an engine without a pressure washer. The trick is to focus on the chemicals and attempt to use the least amount of water as possible.
PRO TIP: A hose from your home will generally push out water flow at approximately 5 to 10 GPM (gallons per minute) at 30 to 50 PSI (pounds per square inch). Most light-duty pressure washers, the kind you buy at any of the big box stores, will pump out 1.5 to 1.7 GPM at 1750 to 1850 PSI. Engines and water don’t work well together. Your goal is to clean the engine with the least amount of water possible. It makes sense to rely on chemical degreasers and a pressure washer with high PSI but low GPM output.
As mentioned above, blasting a bunch of water on your engine for the length of time required to clean it is a bad idea. This is why pressure washers are a detailer’s friend.
When Cleaning an Engine, Less is More
I have already mentioned this a few times, but I’m going to repeat it, yet again. With regards to water and engine cleaning, pressure (PSI) is good as long as gallons (GPM) is low.
Forcing water into an engine is something you don’t want to deal with. Especially since it’s probably a customer vehicle. So use less water and more pressure. And rely on the cleaning chemicals. Let the chemicals and degreaser do the work for you. Anywhere from 1,000 PSI on up to 2,000 PSI is more than sufficient when used with lower GPM and degreasers. Any more than that and you run the risk of injecting water into places you don’t want water in your engine.
Engine Running or Not?
This topic alone could fill several blog posts. For now, let’s just say that the great debate among car detailers for many decades has been whether to keep a car engine running while cleaning it. This is one of those areas that we need to add our standard disclaimer about how we take no responsibility for any damage that you do to an engine. We can only tell you how we’ve done this and you use this information at your own risk.
PRO TIP:If you want to get better at anything, practice. A few years after I started my detail shop, I was always trying to give my new detailers more hands-on experience. Unfortunately, when you put a new detailer on a customer car, you run the risk of something being damaged. So I bought a clunker. See the ‘Shop Dart’ section below to learn more about our lovely practice car.
We Started Out Leaving the Engine Running
At our shops, our process changed over the years. At first, we started out leaving the engine running. I ran the car engine for about 15 minutes to warm it up. Then I would cover up air intakes, electrical boxes, wiring harnesses, and spark plugs.
A generous amount of cleaner/degreaser solution was applied and allowed to soak for 15 to 20 minutes. After the soak, the engine was started. A heated pressure washer on the high heat/steam setting is used to spray the engine clean. We never had an issue with any of the thousands of cars that were cleaning in this way.
Process Changed as Degreasers Got Stronger
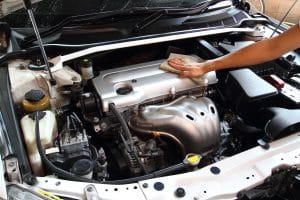
Even in industries as slow-moving and stale as auto detailing, car chemical companies still attempt to make better products. This is what happened that caused me to rethink our engine cleaning process. I started noticing that the degreasers we were buying were showing improved results over the course of a few years. Our engine cleaning process changed as degreasers improved. It made sense since we no longer had to apply so much water and steam to engines to clean them. We were still careful to cover delicate electronics and wiring harnesses, but we were able to use a lot less water.
Your car engine cleaning chemicals make a world of difference. Don’t just buy a cheap degreaser. If you are doing this professionally, then set yourself apart from every Joe Schmo who can buy cheap cleaners for their engines and do it at home.
The Shop Dart
A friend of mine asked if I knew anyone that wanted an extremely old Dodge Dart with a few hundred thousand miles on it. I asked him how much. He said a few hundred bucks. So I gave him $300 and became the proud owner of an incredibly ugly Dart. We eventually named her our ‘Shop Dart’.
Car Engine Cleaning is a Skill
Over the next few years, our team high speed buffed the paint straight down to the metal. We removed dents, did bumper repairs, and scratch removal. And the car was painted and repainted so many times that none of us could remember the original color. All the upholstery was ripped and repaired hundreds of times. Two of my guys even wanted to learn how to rewire a car. So they practiced on the Dart.
Like anything, car engine cleaning is a skill. And skills need to be learned through practice. Our Shop Dart had an engine that was cleaned so often, it shined like it was in a classic car cruise.
If you want to get better, it’s all about practice. If you want to know what happens when you fill fuel injectors with water, then do it on purpose to your junker car. Then learn how to fix it.
Curious about what happened to the infamous Dodge Dart? There’s a cool story about it. My team tore down and rebuilt that car so many times that it looked better than it did when it was brand new. Then one day, my shop manager asked if we could get a few different clunker cars to practice on. I told him we could look around and find some.
Then I had a somewhat brilliant idea. During our morning meeting the next day, I announced that we could put the Shop Dart out in front of our building and sell it. And if the guys wanted to make it perfect, they could all split whatever we sold it for between them. So they repainted it, again, made sure it was running perfect, and detailed it like it was a Lamborghini. It was fantastic.
Then we sold the Shop Dart… for $5 grand. No kidding. $5 thousand dollars. It looked amazing and it ran great. The guy that bought it loved the look. And my team was beyond excited when I handed them the money.
So that’s how we got great at detailing, reconditioning, and cleaning car engines. Hands-on practicing every day on an old clunker car.
We can only tell you how we did it for years and you decide how to proceed from there.
Have fun and enjoy the process. You shouldn’t have any problems as long as you follow the tips outlined above and use common sense along with a good safety regimen.
We hope you enjoyed this how-to on Car Engine Cleaning Tips. Access more tips, training, and insight by subscribing to the AutoDetailGuide.com E-Newsletter.
A professional car detail isn’t considered complete until the carpets are perfect. Unfortunately, that’s not always an easy task. Any detailer that has lived through the wonderful experience of cleaning and detailing a minivan used primarily as a bus for numerous children, will attest to that. And they will even regale you with stories about the experience if you ask.
Two Categories of Car Owners
I learned early on that car owners primarily fall into one of two categories. People who love cars and people who look at cars as nothing more than a mode of transportation. Minivan owners tend to fall into the latter. When they describe the minivan, they say things like, “it’s better than taking the bus.” It’s a means to an end. Getting them and their shit from point A to point B without breaking down.
Raised a Trash Panda in Their Minivan
Nobody loves their minivan. If ever there was a vehicle created for a single-minded purpose, it’s that. Hauling around the entire family. Check. Hauling the groceries. Check.
Don’t feel sorry for the customer while listening to them blame their children for the disgusting smell and ridiculous condition of their family bus. If they respected the vehicle, it would stay clean. So you smile politely as you double your normal rate because you are fairly certain they raised a trash panda in their minivan from birth to adult.
Charge More. Your Time is Valuable.
Don’t feel bad about charging more. Your time is valuable. And don’t accept their sob story about not being able to afford your price. If they are willing to let you spend hours of your day cleaning up their mess that accumulated over many years, then they should pay you for your time. If they balk at your rates and walk, then let them try and find another detailer. Personally, I would rather stay in bed than live through those kinds of horror stories.
Old School Detailers
Old school detailers have inferior equipment. Most of them just used an old shop vac, scrub brush, and a bucket. It’s a horrible way to scrub carpets and isn’t even close to a professional auto carpet cleaning, but they managed somehow. Other less professional detailers like to spray a chemical on your carpets, pressure washes the dirt out, and then drill small holes in your floorboards to let the water drain out. I know you think I’m kidding, but I’m not. I’ve actually seen several car dealerships do this with really bad carpets they didn’t want to replace. It works, but the customer isn’t really happy when they can’t seem to figure out why their carpets get really wet during heavy rains when they drive their car.
Modern Technology for Auto Carpet Cleaning
That brings us to modern technology for auto carpet cleaning that all professional detailers should be using in this day and age. Professional heated carpet extractors will run about $1,500. So if your detailer does not have one, go somewhere else. If they can’t afford $1,500 for equipment that will increase their productivity by a few hundred percents then you don’t want your car near them. Heated carpet extractors will mix water and cleaning chemicals and heat that solution to 210 degrees. The handle attachment is for shooting the heated solution into your carpets and lifting the dirt back out with a very powerful suction system. It’s by far the fastest and best method for achieving the best results in professional quality auto carpet cleaning services.
How a Pro Handles Auto Carpet Cleaning
The reason you go to an experienced detailer instead of a newbie is because of things like this. Cleaning carpets in cars isn’t as easy as the public thinks it is. A good detailer will know how to pre-treat the carpet with specialized cleaners. Spots and stains are also treated with lifting chemicals to remove the stain once the heat hits it. We would also use a small buffer that has a scrub brush attached to it for really tough to clean carpets. This is how a pro handles auto carpet cleaning, how does your detail shop do it?
Training and Practice Equals Expertise
Everybody believes they can be a car detailer. Think about each time you see people in other professions doing their job. How often do you think to yourself, “wow, that’s an easy job that I could do in my sleep.” Clearly, you aren’t the only person that thinks that. Right now someone somewhere is watching a pro detailer working on a car and thinking the same thing.
The problem is that anyone that thinks this is always wrong. You might think it’s incredibly simple to work at McDonald’s. That anyone can do it. But could you? I’m a smart, successful business guy. But I know if I walked into a McDonald’s and was asked to cook burgers, it would take me a while. I’m sure there is some big button to heat up the fryer, but is there also a temperature setting? And where are the burgers? Is there a button to push that tells me how long to cook it?
It’s all about training and practice, which leads to expertise.
The fact is, without training for that burger-flipping position, we would all be lost. It’s the same for detailing a vehicle. And auto carpet cleaning has both a science and art to doing it right.
Poor Technique and Equipment Leads to Mold
A good car detailer knows to pre-spot sections of carpet that aren’t visible. We do this to test for color separation during the carpet cleaning process. Certain chemical cleaners can suck the color right out of many types of carpet.
And saturating carpet with water can develop mold if it’s not extracted quickly. Mold is a surefire way to get a claim filed against your detail shop liability insurance. Nobody wants the smell nor the bad health implications of a mold spore breakout within their vehicle.
Mold is one of those issues that you want to always be on the lookout to protect yourself against. I trained all my team members to know what mold smells like. This training helped numerous times. Like when we received a vehicle from a dealer client late in the afternoon one day. That seemed weird since they always dropped off in the morning or we went to them and picked-up. When my manager got into the vehicle, he immediately smelled the mold. I did too when I checked it.
I told the client we weren’t willing to accept responsibility for the mold. So we didn’t touch the vehicle until the dealer acknowledged the mold problem in writing and, more importantly, that it wasn’t us that caused it. We recommended that the front carpets be pulled out. The dealer wasn’t happy, but they agreed to it. When we pulled it, everything under the carpet was covered in mold. Someone had attempted to clean the auto carpet and saturated it badly in the past.
Properly Insure Your Detailing Business
This is also a good time to remind you to update your business liability insurance. Protecting your detailing business with the proper insurance is incredibly important. Plus, you want to be ready when a customer calls and requests you to fax or email them a certificate of insurance to prove you are insured. Savvy customers understand the importance of insurance coverage, especially if they have higher-end luxury vehicles.
Check out our proper insurance page for specifics as to what you should be looking for and asking about when it comes to insurance at your local shop. Mishandling your auto carpet cleaning job can result in destroyed carpets. How do you feel about mold and mildew, foul-smelling odor, and carpets that need completely ripped out and replaced?
Auto Carpet Cleaning
Your customers are spending good money to have their car professionally detailed. Make sure their car is fully protected by the proper equipment and insurance to do the job right. Auto carpet cleaning should make it look great when it’s done.
Dyeing Packages for Carpet
If the carpets don’t look great, you should recommend dyeing the color back to a new look again. Most detailers have dyeing packages for carpet, just don’t let them use the can spray paint colors on your carpets. It rubs off eventually and it looks horrible. Injectable dyes are better and look more like the real thing. Of course, just starting with professional auto carpet cleaning is the way to go, but there are additional more advanced repair and cleaning options if they are needed.
Check out of our AutoDetailGuide E-News Subscription.
So you want to detail your car and need some home auto detailing tips? It’s not quite as easy as it looks. Expect to spend upwards of 4 to 6 hours detailing your vehicle. It sounds like a long time, but when you see everything that goes into a detail, then that $150+ that you pay your local car detailer doesn’t seem like a lot anymore.
We have developed a good five (5) step process as part of our home auto detailing system. You can follow this to bring your car to like-new condition. This was developed over years experience and trial and error, so we’ve basically perfected the home auto detailing process at this point. Click on each step below and you will have one page that deals with the step you are working on. Print it out for a reference to use while you are detailing the vehicle.
You may still need additional tools and equipment that are necessary to perform a car detail at home.
Our process has been refined over years of high volume detailing. When you do this day in and day out you definitely get good at it and much faster. So try it a few times and let us know how it goes for you. Home Auto Detailing Tips from your friends at AutoDetailingGuide.com.


![Paint Overspray Removal [UPDATED 2022]](https://autodetailguide.com/wp-content/uploads/2019/12/AutoDetailGuide-Paint-Overspray-Removal-962x544.jpg)